Introduction: The Machine Is Not the Problem
You load a new design onto your USB drive. You walk over to your embroidery machine, plug it in, and scroll through the files. Nothing. Blank screen. Or worse, the machine starts sewing, then five minutes later the thread snaps, the fabric bunches up, and you hear that awful grinding noise that makes your heart sink.
What is going on? Did you buy a lemon machine? Is the universe conspiring against your embroidery dreams?
Here is the truth that most people figure out the hard way. Your machine is probably fine. The problem is almost always the file you are feeding it. And that is exactly where professional Embroidery Digitizing Services come in. They understand why machines reject files and how to create files that machines actually love to sew.
Let me walk you through the most common reasons your machine hates your file and how the right digitizing service solves every single one.
Reason #1: Wrong File Format for Your Machine
This is the number one reason your machine refuses to even show your design on the screen. Embroidery machines are picky eaters. They only digest specific file formats.
Brother and Babylock machines want PES files. Tajima commercial machines want DST files. Melco machines want EXP files. Janome wants JEF. Husqvarna wants HUS. If you feed your Babylock a JEF file, it will stare at you like you just handed it a brick .
I have seen so many people download a beautiful design from the internet, assume any embroidery file works, and then spend hours troubleshooting why their machine says "unrecognized file format." The solution is simple. Get the right format .
Professional digitizing services solve this problem immediately. They ask you what machine you own and deliver your design in the exact format your machine needs. Most services offer multiple formats for free, so you can get your design in PES for your Babylock and DST for your friend's Tajima at no extra cost .
Here is a quick cheat sheet. If you are not sure what format your machine needs, check your manual or look at the files you have successfully used before. That file extension tells you everything.
Reason #2: Design Is Too Large for Your Machine
You found an amazing design. You load it onto your machine. Nothing shows up. No error message. Just... nothing. The machine acts like the file does not exist.
Here is what is happening. Your design is too big for your machine's hoop or exceeds the maximum stitch count your machine can handle. Some machines simply refuse to display designs that are too large. They do not give you an error. They just pretend the file is not there .
This happened to someone using a Babylock Ellageo. They kept trying to load PES files onto their machine using a floppy disk, and the files never appeared. The culprit? The design size exceeded what their machine could handle .
Another common scenario involves file size limits. When transferring embroidery data from software to a machine, you might see a "Disk full" error. This does not mean your USB drive is full. It means the embroidery data you tried to transfer exceeds the maximum size your machine can receive .
Professional digitizing services prevent this problem by asking you for your finished design size upfront. They will also check whether your requested size works with your machine's hoop capacity. If you ask for a ten-inch design on a machine with a six-inch hoop, a good digitizer will warn you before you waste your money .
Reason #3: Corrupted or Poorly Exported Files
Sometimes the file format is technically correct, but the file itself is corrupt. This happens more often than you might think, especially with files generated by free online converters or auto-digitizing tools.
Your embroidery machine reads the file and sees garbage data. It tries to make sense of the stitch commands, finds nonsense, and either refuses to load the file or sews a complete mess. Error messages like "Embroidery is corrupt" or "Unrecognized file format" often point to this problem .
Corruption can happen during download, during transfer to a USB drive, or during the export process from digitizing software. Cheap software and free online tools are notorious for producing corrupted or poorly structured files.
Professional digitizing services use industry-standard software like Wilcom, which is widely considered the gold standard for embroidery digitizing . They export files carefully and test them before delivery. A reputable service will also offer free revisions if something goes wrong, so you are not left holding a useless file .
Reason #4: Incorrect Stitch Density
This problem does not stop your machine from reading the file. It starts sewing, and then disaster strikes. The thread breaks. The fabric bunches up. You hear the needle hitting something it should not hit.
Incorrect stitch density is usually the culprit. Stitch density refers to how many stitches pack into a given area. Too many stitches in a small space creates rock-hard embroidery that can actually tear your fabric or break your needles. Too few stitches makes your design look sparse and incomplete .
Auto-digitizing tools are terrible at setting correct densities. They often default to maximum density because it looks good on screen, but on fabric, it is a disaster. Professional digitizers adjust density based on your fabric type. A design for a hoodie needs lower density than a design for a cotton t-shirt. A good digitizer knows the difference .
Reason #5: Missing or Incorrect Underlay
Underlay stitches are the foundation layer that goes down before your main design. Think of them as the concrete slab before you build a house. Without proper underlay, your top stitches sink into the fabric, distort, and shift around.
Many poorly digitized files either skip underlay entirely or use the wrong type of underlay for your fabric. The result is a design that looks fine in the software but sews like a nightmare.
Professional digitizers add specific underlay stitches based on your fabric. Light underlay for stable fabrics like polyester. Heavy double underlay for stretchy fabrics like knits. Special nap underlay for fluffy fabrics like fleece and towels .
When you order from a professional service, they ask about your fabric type for a reason. That information determines the underlay settings they use .
Reason #6: No Pull Compensation
Here is something every embroiderer learns the hard way. Fabric stretches and pulls under tension. When your machine sews a perfect square according to the digital file, the fabric pulls inward, and that square comes out looking like a squashed rectangle.
Pull compensation is the fix. The digitizer makes the design slightly wider and taller than the final intended size. When the fabric pulls, the extra width compensates, and the final design looks correct.
Auto-digitizing tools mostly ignore pull compensation. They assume fabric behaves perfectly, which it never does. Professional digitizers apply pull compensation based on your fabric type and design size. A hoodie needs more compensation than a woven cotton. A large design needs more than a small patch .
Reason #7: Small Text That Cannot Sew
You upload a design with tiny text. It looks great on your computer screen. The digitizer says they can handle it. But when you sew it, the letters come out as blobby, unreadable messes.
Here is the truth. Embroidery has physical limits. A letter smaller than a quarter inch tall becomes a blob. A line thinner than one millimeter disappears under the thread. No amount of digitizing skill can change the physics of thread and fabric .
Professional digitizing services will warn you about this before they take your money. They will tell you that your two-point text will not sew and suggest alternatives. They might recommend making the design larger, removing the text, or using a bolder font. A good digitizer saves you from wasting your time on impossible designs .
Reason #8: Wrong Thread Color Sequence
You load a design with five colors. Your machine starts sewing with red, then blue, then yellow, then green, then black. But your artwork clearly shows red text on a blue background, not this random mess.
This happens when the digitizer does not properly sequence the thread colors in the file. Some formats like DST do not store color information at all, so you need a separate color chart . Other formats store colors, but the digitizer might assign them in the order they digitized the design rather than the logical sewing order.
Professional digitizing services provide a color sequence chart with every file. For PES files, they can embed the color information directly into the file. For DST files, they send a separate document showing exactly which color to load and when .
How Professional Digitizing Services Fix All of This
Now that you know what goes wrong, let me show you what professional digitizing services do differently.
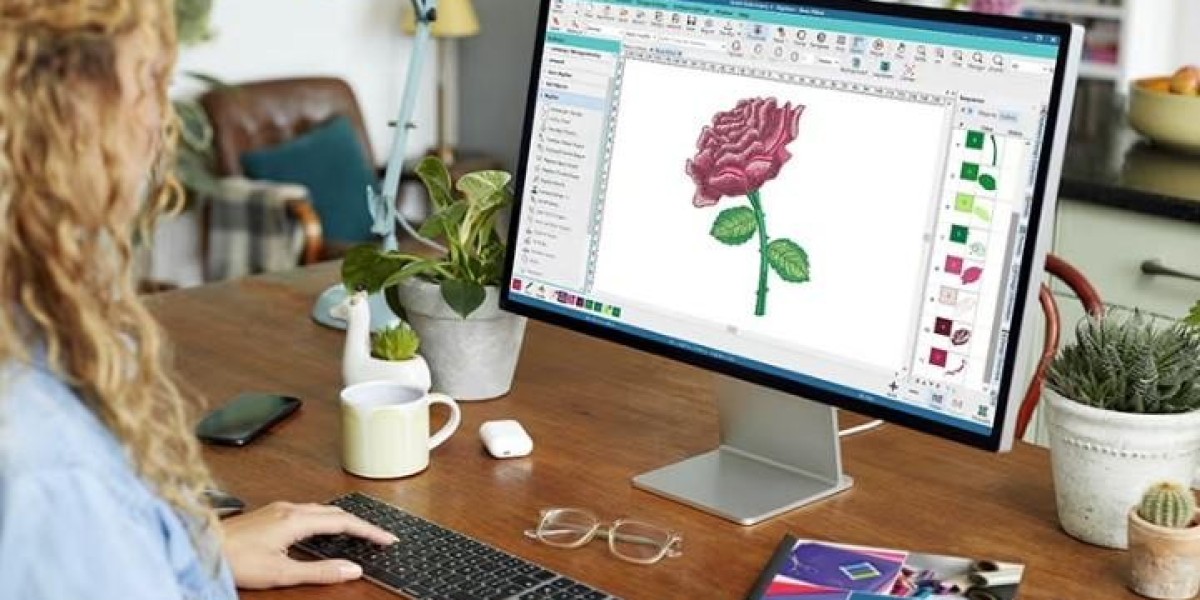
First, they use professional software like Wilcom. This is the industry standard for a reason. It gives digitizers complete control over every stitch decision .
Second, they digitize manually. The best services never use automatic digitizing. A human looks at your artwork and decides where each stitch goes. They adjust density, underlay, pull compensation, and stitch angles for your specific fabric and design size .
Third, they test their files. Professional digitizers run simulations and sometimes sew physical tests before delivering your file. They catch problems before you do .
Fourth, they offer unlimited revisions. If your first test sew reveals an issue, a good service adjusts the file for free until you are happy. No extra charges. No arguments .
Fifth, they ask the right questions. Before starting your order, a professional service asks about your machine brand, your fabric type, your finished size, and your thread colors. This information is not optional. It is essential for creating a file that works .
What to Look For in a Digitizing Service
Not all digitizing services are created equal. Here is what to look for when choosing one.
Look for verified experience. Freelance platforms like Upwork verify identities and show client reviews. Look for digitizers with Wilcom expertise and years of experience .
Look for fast but realistic turnaround. Standard turnaround is four to twelve hours. Rush orders can be one to four hours. If someone promises one hour for a complex jacket back design, be skeptical .
Look for unlimited revisions. A confident digitizer offers free revisions until you are satisfied. Avoid services that charge for every tweak .
Look for transparent pricing. Most services charge a flat rate per design based on stitch count and complexity. Avoid hidden fees for format changes or minor edits .
Conclusion: Stop Blaming Your Machine
Your embroidery machine is not the enemy. It is a precision tool that follows instructions exactly. If those instructions are bad, the output will be bad. But when you feed your machine a properly digitized file with correct densities, underlay, pull compensation, and format, it will reward you with beautiful, professional results.
Professional embroidery digitizing services exist because converting artwork to stitch files is genuinely difficult. It takes years of practice to master. Auto-digitizing tools promise shortcuts but deliver frustration.
So the next time your machine rejects a file or ruins your fabric, do not throw your hands up in despair. Recognize the problem for what it is: a digitizing issue, not a machine issue. Send your artwork to a professional service. Give them your machine details, fabric type, and finished size. Let them create a file your machine will actually love.